
Good day!!!
Just want to apologize for my English. I am from Belarus and if there are errors, then feel free to write about them, I will correct them :).In previous posts (1 and 2) we have installed and configured our program (GNS3). Today, I invite you to add the first devices in GNS3, start them and to make a simple configuration for the connection between them.
So, invite you…
Run our program. We will see working window:

Here, in the first column write the name of our project, in second column should be registered the path to save our project (if everything was configured correctly, the project folder will create in a subfolder «Project»). Select all checks (need to automatically save the configuration file and NVRAM when you click on «Save»). Click «OK».
To add device, simply select it from list on the left, hold the left mouse button drag it to the workspace and release button. For the first example I chose two cisco 3640 (from the platform of 3600). (If you are not tied the IOS to the device, read my previous post "Configure GNS3 on Windows 7", where I talked about it).
Now, before you run devices, we need to configure them a little. For this, push the right mouse button on device and select item «Configure» in dropdown menu. This window should be open:

Here, we choose our device (R1) and select the item «Slots» in the dialog box (right):

For Slot 0, in the dropdown menu, select the NM-1FE-TX (this is one port FastEthernet). For the first time, I think, as long as enough :). Push «Apply» and then «OK». To the second device we do all the same.
If you want to change the name of device, then before launch, click right mouse button on it and select item «Change the hostname» from dropdown menu.
Run our devices. For this, you can use the button on top toolbar (green triangle), then run all devices at once, or you can click by right mouse button on every devices and choose green triangle from dropdown menu. For control, that devices run, they will be green color in the right corner of the screen (the field «Topology Summary»).
When devices are running, you must define parameter Idle PC for each of them. This will save operative memory of our computer. For this, click again right mouse button on devices and choose item «Idle PC» from dropdown menu. If you see that Idle PC is already set, do nothing:
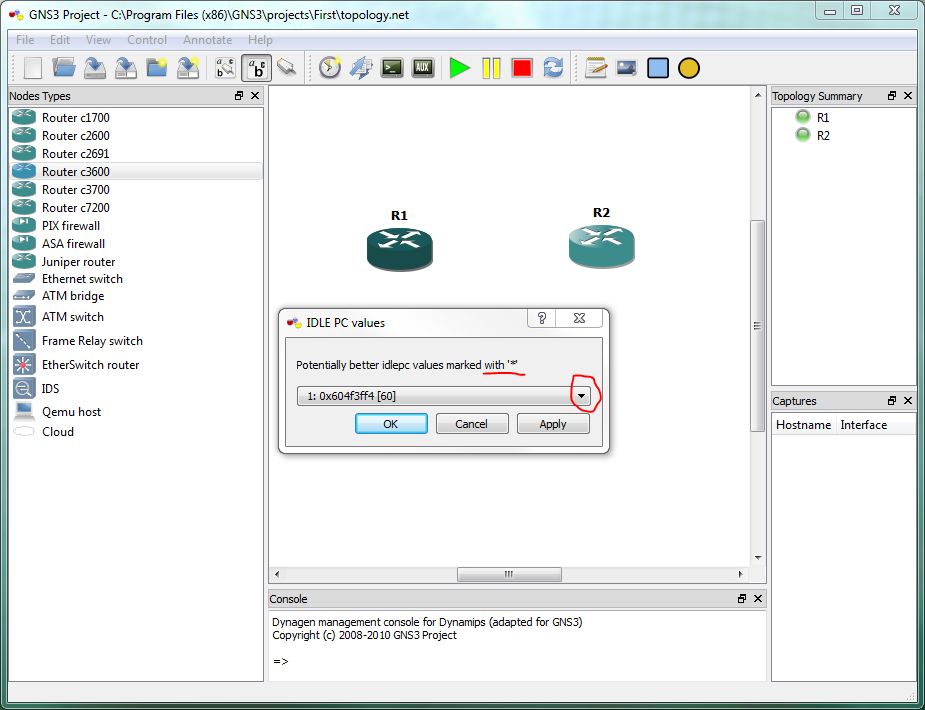
In the pop-up window from the dropdown menu select the value marked with *. (There are times when «*» is not set, then just choose any value.) Click «Apply» and then «OK». Do this with all other devices.
Now let’s connect our devices.

For this, activate mode «add connections», as shown above. After this, we direct the cursor to the first device, click on it, select interface that need (in our case it will be one), and drag the line to the next device. Click on second device and select interface from list. That’s all, our devices connected between each other. Turn off mode «add connections». As a result you should have something like this:

Let’s save our project. (File – Save, or click corresponding button on toolbar).
Now it's time to go to our devices from console. To do this, again, click right mouse button on device and select item «Console» from dropdown menu.
You should see window of program Putty:

Let's do some default adjustments for inspect connection between devices:
-
R1>en
R1#configure terminal
R1(config)#int fa 0/0
R1(config-if)#ip address 192.168.0.1 255.255.255.0
R1(config-if)#no shutdown
R1#wr
R1#
-
R2>en
R2#configure terminal
R2(config)#int fa 0/0
R2(config-if)#ip address 192.168.0.1 255.255.255.0
R2(config-if)#no shutdown
R2#wr
R2#

How you can see, all working fine, our devices interconnected successful. Even CDP protocol is working fine:

Now, do «wr» command on all devices, close all console windows , stop all devices (red square on the toolbar or right click on each device) and save our project, exit the program and then relax :).
I congratulate you!!! Today we have added device in to program GNS3, configured them, have connected together and tested the connectivity.
This concludes this post. Hopefully, it will be useful to someone out of you, and maybe all :). Waiting for you in the following posts.
If you have a questions or comments, then do not be afraid to write me!!!! This is my contact information. I will pleased to answer!!!!
With best regards, Ant0ni0n.
No comments:
Post a Comment